Nothing compares to the excitement of heading out into the great outdoors. A camping trip can be a refreshing escape from daily life, but your experience largely hinges on how well you set up your tent. After all, the right shelter not only protects you from the elements but also serves as your cozy retreat after a day of exploration. A smooth setup process allows you to spend less time wrestling with poles and more time enjoying nature.
Enter Coleman tents—the go-to choice for campers across diverse skill levels. Renowned for their durability, ease of use, and thoughtful design features, Coleman’s range of tents caters to everyone—from solo backpackers to families seeking adventure. With thousands of happy campers attesting to their reliability, setting up a Coleman tent can transform a daunting task into a breeze. Ready to tackle your next camping trip with confidence? Keep reading as we guide you through choosing the right model, essential tools for setup, and insider tips that will have you pitching like a pro in no time!


Choosing the Right Coleman Tent Model
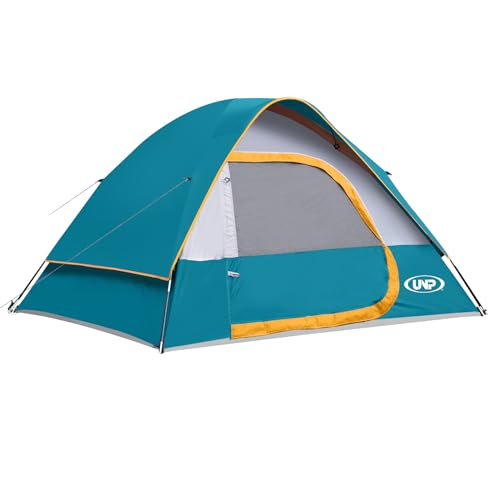
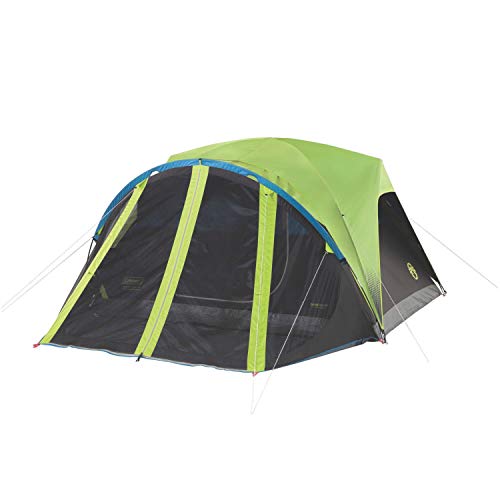
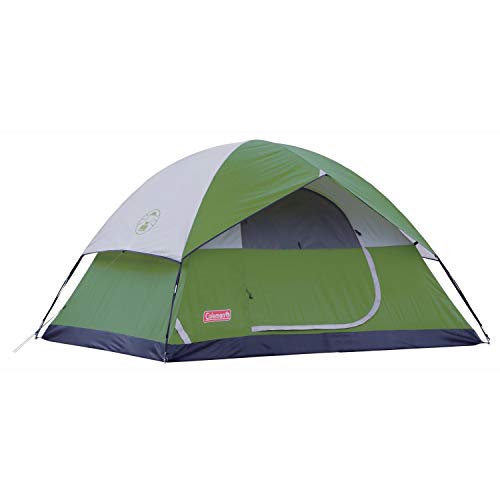
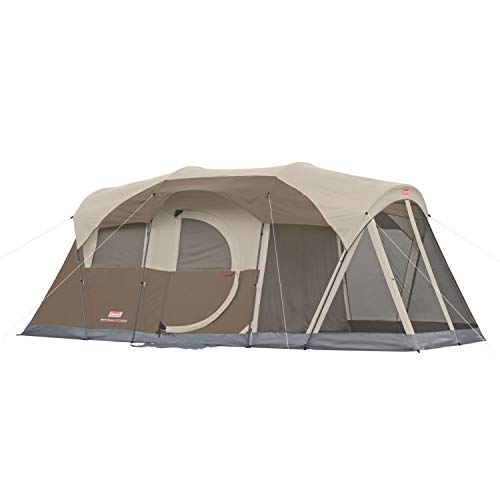
When it comes to selecting the perfect Coleman tent for your camping adventure, knowing the various models available can make a significant difference in your outdoor experience. Coleman offers a diverse range of tents tailored to meet specific needs, including dome tents, family tents, and even lightweight backpacking options. Dome tents are renowned for their aerodynamic shape that effectively sheds wind and rain while providing ample headroom—perfect for smaller groups. Family tents, on the other hand, boast generous space and additional features like room dividers or porches, making them ideal for those camping with kids or larger groups. If you’re hitting the trails, consider a portable backpacking tent designed to be lightweight and easy to set up, ensuring you can comfortably pack up and hike without being weighed down.
When choosing your ideal tent model, certain factors should guide your decision. Start with size: how many campers will be using it? Consider not only sleeping space but also livability—extra room allows for gear storage and movement within the tent when you’re not out exploring. Weight is another crucial aspect; backpackers need something light enough to carry long distances without sacrificing durability. For car campers who don’t have weight restrictions, opting for a heavier family tent with extra amenities may enhance comfort without compromising functionality.
Additionally, don’t overlook special features that enhance your camping experience. Coleman tents often come equipped with weather-resistant materials or built-in ventilation systems designed to reduce condensation during humid nights—an essential feature if you’re camping near lakes or rivers. Some models also include screen rooms or vestibules for added privacy or protection from bugs—a boon for families looking to enjoy meals outside without unwelcome guests! By understanding these elements and aligning them with your needs, you’ll set yourself up for an enjoyable trip under the stars.
Remember that choosing the right model isn’t merely about what looks appealing; it’s about selecting a tent that fits your personal camping style and enhances your outdoor experience. Taking time to evaluate each aspect leads to smarter decisions in gear selection—all ensuring that you camp like a pro right from day one!
Essential Tools and Gear for Setup
Setting up your Coleman tent can be a breeze if you have the right tools and gear on hand. First and foremost, you’ll need some essential items like tent pegs and a mallet. Tent pegs are crucial in anchoring your tent to the ground, ensuring it stays put even on windy nights. A mallet, preferably one with a rubber or plastic head, will help make driving those pegs into the soil much easier without damaging them. If you’re camping in rocky terrain or hard ground, consider bringing along some extra heavy-duty stakes that can better withstand such conditions.
A footprint is another must-have when setting up your tent. This waterproof layer goes beneath your tent to protect it from sharp stones, roots, and moisture from the ground below. It not only extends the life of your tent by providing an additional barrier but can also add a touch of comfort when sleeping outdoors. For those who want to elevate their setup experience even further, employing a tarp is highly beneficial too—it acts as an excellent base to keep mud and dirt at bay plus provides an extra layer of warmth during chilly nights.
Beyond these basics, you may want to consider packing additional gear that facilitates a smooth setup process. A ground cloth can significantly enhance comfort by creating a barrier against dampness while adding some insulation as well. Bringing along a portable chair or stool allows you to take breaks while maintaining focus on your tasks and keeping off the wet grass—bound to slow down any setup efforts! Additionally, having a multi-tool handy can prove invaluable for tightening screws or making quick adjustments when necessary.
Ultimately, preparing your toolkit ahead of time reduces stress during what should be an exciting outdoor adventure. By gathering these essentials—tent pegs, mallet, footprint—and extras like tarps and ground cloths—you’ll be well-equipped for an efficient setup that enables you to enjoy nature sooner rather than later!


Step-by-Step Guide to Setting Up Your Coleman Tent
Setting up your Coleman tent can seem daunting at first, but with a methodical approach, you’ll have it ready in no time. Start by selecting a suitable location that is flat and free of debris. Unpack your tent from the carrying bag and lay it out on the ground. Make sure the door faces an area that provides easy access but is also sheltered from wind or passing campers. Once it’s laid out, identify the tent’s rainfly (if included) and footprint; organize these items close by for a smoother setup.
Next comes the critical phase—securing the poles. Most Coleman tents come with color-coded poles and sleeves to simplify this process. Begin by assembling the pole sections and carefully insert them into their respective sleeves or connectors on your tent body, establishing its frame. As you do this, keep tension on the fabric to prevent snagging or twisting. If you’re working with a dome-style tent, you might need to cross poles for extra support; ensure they are firmly seated into each corner grommet of the tent for maximum stability.
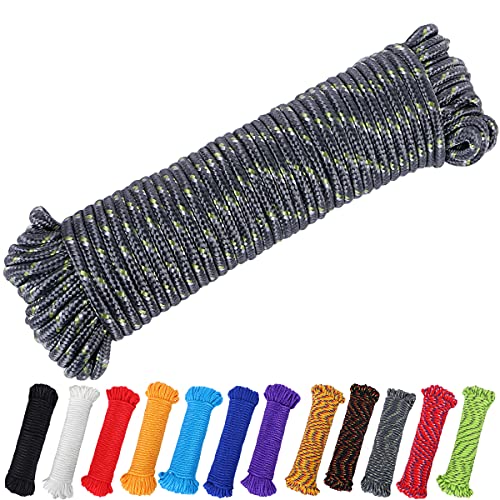
Once your pole structure is in place, stake down your tent using the provided pegs. Insert them at a 45-degree angle away from the base of the tent; this will help anchor it securely against strong winds or other forces. To ensure stability further during inclement weather, consider adding guy lines attached to strategic points on your tent—for instance, near doors or windows—and stake those out as well. These details may appear minor but are absolutely pivotal in achieving a robust setup that stands firm through unpredictable weather conditions.
Finally, don’t forget to attach the rainfly if applicable! Positioning this cover correctly not only keeps moisture out but also increases ventilation inside—a crucial factor when camping in warmer environments. By following these steps closely and securing every aspect of your setup meticulously, you’ll create a solid home base for all your outdoor adventures with ease!
Dealing with Challenging Terrains
When it comes to camping, one of the most vital aspects of a successful setup is choosing the right location, which can be particularly tricky on uneven or rocky ground. If you find yourself in a situation where the terrain isn’t ideal—perhaps you’re perched on the side of a hill or surrounded by boulders—there are strategies you can employ to ensure your Coleman tent remains stable and comfortable. First, look for natural flat spots within the area; even if they aren’t perfectly level, try to pitch your tent so that your head will be higher than your feet when sleeping. This small adjustment can make a significant difference in comfort overnight.
Additionally, investing in a quality footprint—a protective tarp that goes underneath your tent—can help create an extra layer between your tent floor and rough surfaces. Should you encounter rocks or roots poking through the ground, repositioning them beneath stakes rather than allowing them to affect the overall setup is key. If pitching on sloped terrain, drive stakes deeper to prevent shifting during windy nights, ensuring your tent remains securely anchored despite any unexpected gusts.
Beyond evaluating physical characteristics of the ground itself, considering environmental factors such as wind direction and shade can elevate your camping experience significantly. For instance, setting up with the entrance facing away from prevailing winds not only provides extra stability but also protects against potential rain or sand bursts during windy days. Moreover, scouting out shaded areas means keeping cooler while enjoying nature—ideal for those sunny summer afternoons! Remember that trees not only provide shade but can also serve as protection against sudden weather changes.
By approaching both terrain challenges and environmental factors thoughtfully, you’ll boost your chances of having an enjoyable night under the stars. Finding balance between comfort and practicality allows you to focus less on potential discomfort and more on adventure—the essence of every good camping trip with friends or family!


Weather-Proofing Your Tent Setup
Camping can be an adventure filled with beautiful scenery and memorable experiences, but that doesn’t mean you’re immune to the elements. Setting up your Coleman tent in rainy or windy conditions requires some extra consideration to ensure a safe and enjoyable stay. To start, always choose a sheltered location if possible—look for natural windbreaks such as trees or hills that can help shield your tent from strong gusts. As you lay down your footprint, make sure it’s oriented away from prevailing winds, which not only helps with stability but also reduces the risk of rain entering through the tent’s entrance.
Another vital step in weather-proofing your setup is sealing any seams where water could potentially trickle in. Many Coleman tents come with factory-sealed seams, but it’s wise to double-check these areas for any gaps before heading out on your camping trip. Invest in seam sealer—this small tube can be a game-changer—and apply it generously to stitching lines on the fly and bathtub floor of the tent. This precaution will go a long way towards keeping you dry even during heavy showers.
Tarping is another effective method when expecting wet weather. By placing a tarp over your tent before setting it up, you create an additional barrier against rain while offering shade protection on sun-soaked afternoons. A well-placed tarp should cover not just the top of the tent but also extend several feet beyond its perimeter; this way, it acts like an awning, guiding runoff away from essential areas. For windy situations, using stakes or guy lines to secure the tarp is crucial; without this added support, high winds could detach it entirely.
Lastly, don’t underestimate the importance of ventilation inside your tent when dealing with humid environments; proper airflow diminishes condensation build-up that often leads to discomfort during wet nights. Whether it’s adjusting vents or leaving doors slightly unzipped (while still closing them at night), creating air circulation makes all the difference between feeling clammy and cozy inside your shelter. With these strategies in place and by prioritizing weather-proofing techniques, you’ll be better prepared for whatever Mother Nature throws your way!
Time-Saving Hacks for Quick Setup
Setting up a tent can sometimes feel like a daunting task, especially after a long day of travel. To streamline your setup process and ensure that you spend more time enjoying the great outdoors rather than wrestling with your gear, it’s essential to pre-pack your essentials. Start by organizing your tent components before your trip. Store the stakes, poles, and rainfly together in a designated pocket or bag—all labeled clearly. Consider using color-coded storage solutions for different tents if you’re bringing multiple options along. This way, when you arrive at your campsite, everything will be conveniently at hand and ready to go.
Another powerhouse strategy for quick setups is utilizing the buddy system. Teaming up with camping companions not only makes for teamwork but also speeds things up significantly. For instance, while one person unrolls the tent and lays it out flat, another can begin gathering and connecting the poles—this division of labor can shave off precious minutes from the entire setup process. Plus, having someone else around provides an extra set of hands to navigate those tricky corners of the tent or hold it in place while securing the pegs into unforgiving ground.
If you’re camping with kids or friends who are new to setting up a tent, involving them in the process can also enhance their experience and make it more enjoyable. Teaching them about how each part works keeps them engaged while creating camaraderie among campers. Make it a fun learning moment where they take pride in their contributions—after all, nothing builds excitement quite like successfully erecting their sleeping quarters together!
By implementing these simple yet effective hacks before heading out on your adventure, you’ll not only cut down on frustrating moments but also foster an environment filled with enthusiasm for what lies ahead—whether that’s roasting marshmallows over a fire or hiking through breathtaking trails right after you’ve made camp!
Maintenance Tips After Setup
Once your Coleman tent is securely pitched and you’re settling in for a great outdoor adventure, it’s important to keep your living space clean and dry. One effective way to achieve this is by laying down a footprint or ground cloth underneath your tent. This protects the floor material from sharp rocks, sticks, and moisture that can penetrate through the ground. During your stay, encourage everyone in your camping party to remove their shoes before stepping inside. Not only does this help keep dirt and debris out of your sleeping area, but it also maintains a more pleasant environment—nobody likes waking up to find sand mixed with their sleeping bag!
Maintaining a proper ventilation system is another essential aspect of keeping your tent comfortable and preventing condensation buildup inside. On chilly nights, you might be tempted to zip everything closed tightly; however, allowing some airflow can help mitigate dampness while still keeping warmth in. For instance, if you’re camping in higher humidity or rainy conditions, consider opening the tent windows slightly while ensuring that they are covered with rain flaps or tarps to prevent water ingress.
When it’s time to pack up your tent after an enjoyable couple of days under the stars, practicing proper teardown techniques is crucial to preserving its longevity. Start by removing all items from within the tent so you can inspect for any damages or dirt accumulated during your stay. If there are small twigs or pebbles stuck on the floor fabric, gently shake them off before disassembling the tent structure. Also, be cautious when collapsing poles; take extra care not to bend them too forcefully as this may damage both poles and connectors.
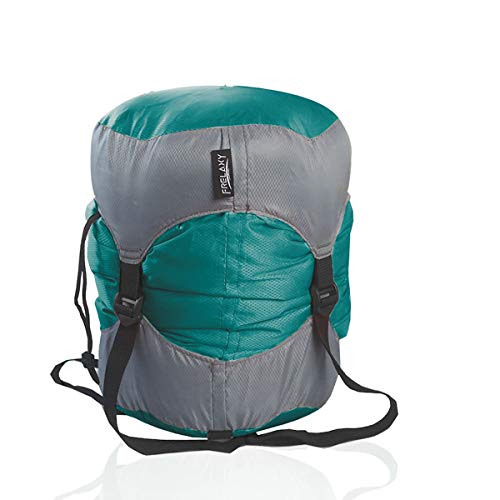
After everything is down and packed away into its storage bag (after drying it off if necessary), always store it in a cool dry place until the next use. By following these simple maintenance tips during and after your camping trip with a Coleman tent, you’ll ensure it remains pristine for many adventures to come!
Frequently Asked Questions about Coleman Tents
When it comes to camping with a Coleman tent, novice campers often find themselves grappling with a few common concerns. One of the primary anxieties revolves around condensation inside the tent, especially during humid nights. While it’s natural for moisture to build up from breath and body heat, proper ventilation can significantly reduce this issue. Many Coleman tents come equipped with adjustable vents that allow for airflow while keeping pesky bugs out. To further combat condensation, be sure to leave an open zipper at the bottom of your fly—this small adjustment allows moist air to escape, making your overnight sleep more comfortable.
Another frequent concern is space; how much room does one actually need in their tent? Understanding the dimensions and sleeping capacity of various models is key. For instance, if you’re camping with family or friends, choosing a tent labeled as “6-person” might sound like ample space. However, remember that this number usually accounts for just sleeping spaces—it’s wise to account for gear storage too! Opting for larger models or adding vestibules can make all the difference when it comes to comfort and convenience throughout your trip.
There are also several myths about Coleman tents that deserve attention. Some people claim that these tents lack durability due to their lightweight models, but the fact is that many Coleman’s offerings are built with robust materials designed specifically for outdoor adventures. They may not weigh as much as some heavy-duty tents but still offer quality protection against the elements. Additionally, contrary to popular belief, Coleman’s weatherproofing technologies have advanced significantly in recent years. Many of their newer models feature patented WeatherTec systems which include raised floors and inverted seams designed to keep water out effectively.
As you step into your camping adventure armed with information about setup and maintenance strategies discussed earlier, it’s equally important to squash these misconceptions surrounding Coleman tents. With proper knowledge and selection suited to your needs, you can confidently enjoy all the beauty nature has to offer without unnecessary worries. So go ahead; pitch that tent and make lasting memories under the stars!
Enjoy the Great Outdoors with Confidence
In this article, we covered everything you need for a successful camping experience with your Coleman tent. From selecting the right model to essential setup tips and weather-proofing strategies, you now have the tools to set up quickly and efficiently. Remember to consider your terrain and use time-saving hacks to make your camping journey even smoother.
With these practical insights in mind, you can confidently embrace nature’s beauty. So gather your family or friends, grab your gear, and head out on your next adventure knowing that you’re well-prepared. Enjoy the great outdoors and make unforgettable memories along the way!

![Feast by Firelight: Simple Recipes for Camping, Cabins, and the Great Outdoors [A Cookbook]](https://outdoortrailtrek.com/wp-content/uploads/2024/09/feastbyfirelightsimplerecipesforcampingcabinsandthegreat.jpg)
