Are you ready to take your outdoor adventures to the next level? Imagine crafting your own camping tent, tailored specifically to your needs and style. A DIY camping tent not only allows for a personal touch but also brings a rewarding sense of accomplishment. The joy of sleep under the stars in an abode that you built yourself can significantly elevate any camping experience.
In today’s economy, budget-friendly solutions are more important than ever. Ready-made tents can be expensive and often don’t offer the versatility or features you might desire. Building your own tent opens up innovative possibilities while saving precious dollars for other gear or activities. It’s time to unlock this simple yet impactful skill that not only enhances your camping trips but also encourages creativity and self-sufficiency. Let’s dive into how you can create the perfect shelter for your outdoor escapes!
Understanding Tent Types
When it comes to crafting your own camping tent, understanding the various types of tent designs is essential for ensuring that your creation matches your personal needs and camping conditions. The three most popular styles are A-frame, dome, and tarp tents. Each has its distinct advantages and challenges based on the environment you’ll be venturing into. For instance, A-frame tents boast a classic design reminiscent of traditional camping shelters, providing ample headroom while remaining stable against windy conditions. However, they can take more time to set up and often require sturdy stakes for greater stability.
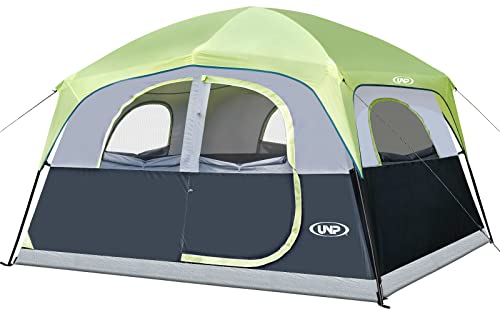
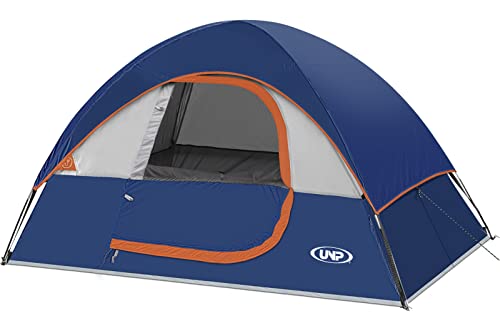
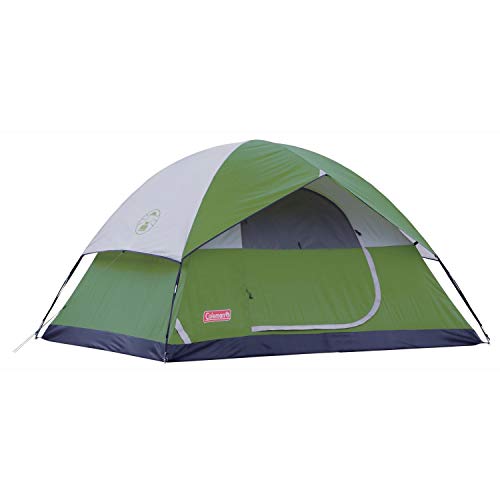
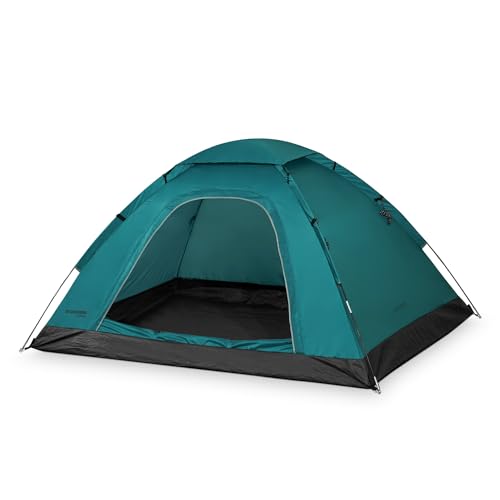
On the other hand, dome tents have gained widespread popularity for their lightweight structure and easy setup process; they typically feature flexible poles that create a spacious interior. This makes them ideal whether you’re hiking in the backcountry or camped near the car. However, keep in mind that while dome tents perform well in light rain and moderate winds, heavy storms may test their limits. If you lean toward versatility and efficiency during your outdoor adventures, a dome tent might just be the perfect option to craft!
Alternatively, tarp tents offer a minimalist approach that’s favored by ultralight backpackers looking to save weight without sacrificing coverage. These simple structures can be pitched multiple ways using available trees or trekking poles for support, offering tremendous flexibility depending on location. Yet this style does require some expertise in knot-tying and pitch techniques to ensure proper tension and protection from elements like rain or insects.
Ultimately, choosing the right type of tent boils down to considering factors such as your typical camping destination (e.g., forested areas versus open fields), weather patterns you may encounter (ranging from sunny days to sudden showers), along with personal preferences regarding ease of setup versus weight capacity. By weighing these considerations thoughtfully against each tent type’s strengths and weaknesses, you’ll find yourself one step closer to creating a DIY camping tent that suits your adventurous spirit perfectly!
Essential Materials and Tools
When gearing up for your DIY camping tent project, gathering the right materials is key to ensuring a solid build. At the core, you’ll need durable fabric—such as nylon or canvas—to construct the main body of your tent. Nylon is lightweight, making it ideal for backpacking trips, while canvas offers robustness and better weather resistance for car camping scenarios. Additionally, don’t forget essential items like ropes (for guy lines), stakes (to secure your tent against the wind), and possibly even a rainfly to provide extra protection against unexpected weather.
To bring your vision to life, you’ll also require specific tools that will make construction smoother. A good pair of heavy-duty scissors will be invaluable when cutting fabric to size; it’s worth investing in quality ones to prevent fraying edges. A measuring tape will ensure precision in your cuts and help maintain symmetry in design. If you’re feeling particularly handy, a sewing machine can speed up the process substantially—just be sure it’s capable of handling thicker fabrics if that’s what you’ve chosen!
Now let’s turn our attention to where you might find these materials at budget-friendly prices. Thrift stores are treasure troves of outdoor gear; you may stumble upon old tents whose fabric could be repurposed. Vintage fabric shops sometimes have amazing deals on discontinued styles that scream personality! You could also scour online marketplaces like Craigslist or Facebook Marketplace for preloved camping supplies that someone no longer needs but are still very much usable.
Furthermore, consider getting creative with materials around your home or engaging with local communities for resource exchanges. Using repurposed materials not only saves money but also adds a unique touch to your tent design—turning sustainable practice into stylish innovation. As you prepare to embark on this DIY adventure, assembling both useful tools and affordable materials sets the stage for crafting a personalized camping experience!
Selecting the Right Fabric
Choosing the right fabric is a critical step in crafting your DIY camping tent, as it directly impacts durability, weight, and overall performance. Two of the most popular options are nylon and canvas. Nylon is lightweight and offers excellent water resistance, making it an ideal choice for backpackers who need to keep their gear light and compact. On the other hand, canvas is more robust and breathable but can be heavier and bulkier when packed away. While it provides good weather resistance if treated correctly, it may not dry as quickly as nylon after rain or dew.
When considering your camping style—backpacking versus car camping—weight becomes a significant factor. For those who hit the trails with their gear on their backs for hours at a time, lightweight fabrics like ripstop nylon can make a considerable difference in comfort during travel. Conversely, car campers have more freedom regarding weight since they won’t be carrying everything for long distances; thus, they might opt for thicker materials that provide additional insulation or sturdiness against wind and weather changes.
As you search for fabric, consider smart shopping strategies to optimize your budget. Local fabric stores often have seasonal sales or remnants that can offer quality materials at reduced prices. Online retailers frequently run discounts on bulk purchases or specialty fabrics designed specifically for outdoor use. Thrift stores can also be a surprising goldmine where you might find repurposed tarps or unwanted tents being sold cheaply—perfect for getting the durable fabric without breaking the bank! Additionally, look into DIY communities online where members share tips about sourcing second-hand materials or even offer swaps amongst each other.
Ultimately, selecting fabric isn’t just about gathering what’s readily available; it involves understanding your needs as a camper while balancing durability with weight considerations. With careful thought put into this decision-making process—and by employing savvy shopping techniques—you’ll ensure that your crafted tent stands up against nature’s challenges while still fitting comfortably within your adventure plans!
Step-by-Step Tent Construction Guide
Building your own camping tent might sound daunting, but with a little planning and patience, it’s easier than you think! Start by sketching out your design. Determine the size of the tent based on how many campers will be using it—consider the dimensions that will allow for comfortable sleeping arrangements and enough space for gear storage. Once you have a blueprint, gather all necessary materials and tools like fabric, ropes, stakes, scissors, and measuring tape. If you’re unsure about proportions or measurements, creating a scale model from cardboard can help visualize the final product.
Before diving into construction, ensure you’re well-versed in safety practices when handling tools. Always wear protective eyewear while cutting materials to shield yourself from flying debris. Use sharp tools with caution; keeping blades clean and maintained will minimize accidents during use. It’s also wise to enlist a friend to help; having an extra set of hands makes holding sections in place much simpler and safer throughout the assembly process.
Now let’s get down to assembly! Begin by laying out your fabric on level ground to cut it according to your planned dimensions—remember to add some extra inches for seams! Once cut, attach any side panels or additional features you envision onto the main structure (like an awning or vestibule). For securing the shape of your tent, consider using grommets along edges where you’ll want to tie cords or fasten stakes into the ground—a simple yet effective way to increase stability during windy conditions.
Throughout construction, make sure to refer back to your initial sketch and take time at each stage to double-check measurements before making permanent decisions. Visual aids can be particularly helpful here; diagrams showcasing angles or connection points can save you from guesswork. Don’t forget that building should be enjoyable—turn on some music or set up a friendly challenge with whoever is helping you; after all, this tent isn’t just a structure—it’s the backdrop for countless adventures yet to come!
Customization Ideas
Once you’ve constructed your own camping tent, it’s time to make it truly yours through customization. One of the easiest ways to personalize your tent is by selecting vibrant colors and unique patterns for the fabric. Consider using fabric paint or patches to add your favorite outdoor motifs, such as mountains or wildlife silhouettes. This not only enhances the aesthetic appeal but also helps your tent stand out in a crowded campsite. For example, if you’re a star-gazer at heart, adding glow-in-the-dark stars can create a magical ambiance as night falls.
Beyond just colors and designs, think about functional features that will elevate your camping experience. Adding ventilation flaps can help manage airflow and reduce condensation inside the tent on those warm summer nights while ensuring you’re comfortable during a chilly evening breeze. Additionally, consider incorporating pockets into the inner walls of your tent for stashing small items like flashlights, snacks, or maps—any camping gear that would easily get lost on the ground! You might also want to facilitate easier access by creating two entrance doors; perfect for splitting duties when nature calls.
Practical safety elements should not be overlooked either. Implementing tie-downs can secure your tent against wind gusts while you’re away enjoying nature’s beauty. Think about reflective elements; attaching reflective strips around the perimeter or on guylines can prevent tripping hazards at night and make it easier to locate your setup after dark. Not only does this increase safety for you and fellow campers, but it also adds an extra touch of character!
Lastly, explore various DIY hacks that others have successfully implemented—such as creating an awning using extra fabric for shade or even installing mini solar lights along the edges of your tent to create an inviting glow after sunset. Customization provides an opportunity to infuse both style and functionality into your camping setup—they’re not mutually exclusive! By making thoughtful aesthetic choices alongside useful adaptations, you’ll enjoy a personalized space that perfectly accommodates all your adventures in nature.
Maintenance and Care Tips
Taking the time to maintain your DIY camping tent is crucial to ensure it serves you well on many outdoor adventures. One of the easiest ways to prolong its life is through regular cleaning after each use. For a simple cleaning method, wipe down the inside and outside with a damp cloth to remove dirt, dust, or any unwanted debris that might have accumulated during your trip. If you’ve encountered mud or stains, consider using a mild soap mixture with water—just remember to avoid harsh chemicals that could damage the fabric. Allow your tent to dry completely before packing it away; moisture can lead to mold growth and unpleasant odors.
Repairing minor issues promptly will also help keep your tent in top shape. Common problems like tears or small leaks can be patched up easily at home without much hassle. For tears in the fabric, employing an iron-on patch can be incredibly effective—you simply place the patch over the damaged area and heat it with an iron following package instructions. In cases of leaking seams, applying seam sealer can provide an effective waterproof barrier; just brush it along seams where water tends to trickle in after heavy rain, ensuring you’re prepared for unpredictable weather.
Storing your tent correctly is another essential step towards preserving its integrity. Always make sure that it’s clean and dry before folding it up; storing a damp tent could result in mildew taking hold, which may become hard to remedy later on. Consider using a breathable storage bag rather than a tightly sealed plastic one for long-term storage—this allows air circulation while protecting against dust and pests. A designated cool, dry spot—like a closet shelf or under a bed—will also keep it safe from extreme temperatures that could compromise its material over time.
Incorporating these maintenance tips into your camping routine ensures not just longevity for your DIY achievement but enhances your overall experience outdoors as well! A well-cared-for tent adds comfort and peace of mind during those starry nights under the open sky — so you’re ready for whatever adventure awaits!
Fun Camping Activities with Your New Tent
Once you’ve successfully crafted your very own camping tent, the adventure doesn’t have to stop at pitching it. There are countless fun activities that you can enjoy with your family and friends that require minimal setup right around your new DIY shelter. A classic night under the stars is perfect for winding down after a day of exploring. Simply lay out some blankets outside your tent, grab a few snacks, and allow everyone to soak in the beauty of the night sky. Don’t forget to bring a stargazing app or a book on constellations to turn the experience into an educational moment.
Additionally, consider engaging in family-oriented games that can be played nearby, such as flashlight tag or scavenger hunts. Flashlight tag adds a thrilling twist to hide-and-seek, making use of shadows and beams from your trusty torches for an exciting evening activity. For scouting lovers—young and old alike—a scavenger hunt allows everyone to explore their surroundings while enhancing teamwork skills. Create a list of natural treasures (like acorns or interesting leaves) for players to find within a designated area; this not only fosters connection but also encourages discovery.
As you gather memories around your campfire or picnic table set up near the tent, storytelling becomes another fantastic bonding activity! Each person can take turns sharing their favorite camping experiences or concocting creative bedtime stories by building off each other’s ideas. This not only keeps spirits high but also strengthens family ties through shared laughter and imagination.
Inspiration from Real-Life DIY Projects
To inspire your DIY venture further, let’s delve into stories from fellow campers who embraced the art of crafting their tents. Take Sarah from Oregon, for instance: always an avid hiker and outdoor lover, she designed her triangular tarp tent using lightweight materials found at her local thrift store. Not only did she manage significant savings on gear costs, but her innovative design earned praise among her hiking buddies for durability during unexpected rain showers! Emily and Jake showcased creativity by transforming an old parachute into a stunning dome-shaped tent complete with windows; they reported enjoying warm evenings while snuggled inside their unique creation.
Many campers have added personal touches that reflect their personalities and lifestyles within their designs. From hand-painted patterns using weather-resistant fabric paints to employing recycled elements like pallets for flooring—these innovative adaptations demonstrate how DIY projects aren’t just practical but can be deeply personal endeavors too! Reading testimonials online reveals that people often forge deeper connections with their gear when investing time in building it themselves—the satisfaction of seeing one’s efforts result in memorable experiences is unparalleled.
These real-life examples serve as great motivation: they highlight how camping can transcend active outdoor adventures into meaningful moments enriched with creativity and community spirit through collaborative creations! So, inspire yourself by dreaming beyond basic shapes; consider what makes camping special to you—and start sketching those ideas into reality as you prepare for extraordinary weekends beneath the stars!
Wrap-Up Your DIY Adventure
Crafting your own camping tent offers a unique blend of satisfaction and savings. By taking the time to build your own shelter, you not only gain a deeper appreciation for your outdoor gear but also save money that can be used for other adventures. Each stitch and every pole becomes part of your story as a camper. Plus, when things don’t go exactly as planned, these moments often turn into the best campfire tales.
So, don’t hesitate! Gather your materials and get started on your DIY camping tent journey today. With the knowledge you’ve gained from this guide, you’re already equipped for success. Embrace the challenge with confidence, and soon you’ll have a personalized tent ready to accompany you on new excursions. Happy crafting and even happier camping!
