The guide “How to Fill the Advanced Elements Portable Shower” provides a straightforward method for efficiently preparing your portable shower for outdoor use. It outlines the necessary steps, including locating a clean water source, removing the cap and hose, and filling the bag until it reaches the desired level. The guide emphasizes the importance of securely sealing the shower bag to prevent leaks and suggests allowing the water to warm under the sun for a more enjoyable shower experience. With these simple instructions, you can ensure a refreshing and eco-friendly shower while camping, hiking, or traveling.


Gather Your Supplies
Gather the necessary supplies before starting. Ensure you have the Advanced Elements Portable Shower readily available. Locate a suitable water source such as a lake, river, or a container filled with water. Keep a funnel nearby to facilitate easier filling of the shower bag.
Inspect the portable shower for any defects or missing parts. Prepare the area where you’ll be setting up the shower. If using a lake or river, ensure it is safe and accessible. Fill the shower bag using the funnel to avoid spills and make the process efficient. Place the filled shower bag in a secure and elevated position to allow for optimal water flow while showering.
Locate a Suitable Water Source
Identify a clean water source by looking for freshwater streams, lakes, or other natural bodies of water. Approach the water source and inspect its surroundings. Ensure the area is free from pollution, debris, or any signs of contamination. Avoid water near agricultural runoff, industrial areas, or regions with heavy foot traffic. If using a lake or river, choose a spot that flows away from populated areas to minimize the risk of pollutants.
Fill your portable shower with water collected in a clean bucket, ensuring the bucket has not been used for any harmful substances. If you’re near a stream, submerge the bucket several feet downstream from the point where water enters the stream, allowing it to flow and filter through the natural environment. If you opt for a lake, dip the bucket into deeper waters, where sediment settles, providing cleaner water. Always check the water clarity; clear water is generally a good indicator of cleanliness, while murky or discolored water should be avoided.
Open the Shower Bag
- Unzip the main compartment of the portable shower bag carefully, ensuring you grasp the zipper firmly. This will prevent any accidental tearing or damage to the bag material.
- Pull the zipper all the way down until the opening is wide enough. Check that there are no obstructions inside that might hinder the filling process.
- Position the bag in an upright position on a flat surface, making sure it is stable to avoid spilling.
- Begin filling the bag with water, ensuring the opening allows for a smooth flow. Aim for a capacity that suits your needs, typically around 5 to 10 gallons depending on the size of the bag.
- After filling, securely zip the compartment closed, ensuring no water leaks out. This will keep the water contained and ready for use when needed.
Position the Shower Bag
Hold the shower bag upright or place it on a flat surface. Ensure that the area is clean and dry to avoid any contamination. If you are using a funnel, securely position it in the opening of the bag. This will help guide the water into the bag without creating spills.
Pour the water slowly into the funnel, monitoring the flow to prevent overflow. Keep an eye on the filling process, and adjust the funnel’s position if necessary to maintain a steady stream. Once the bag reaches the desired water level, carefully remove the funnel and seal the bag to prevent leaks.
Fill the Shower Bag
Pour water into the bag through the opening or the funnel until it reaches the desired capacity. Ensure that you are using clean water for the best results. Fill slowly and monitor the water level closely. Stop pouring once you reach the marked fill line or your preferred level, leaving some airspace at the top of the bag. This airspace is crucial as it allows for the expansion of water when it heats up, preventing any pressure build-up that could cause leaks.
Be cautious not to overfill the bag, as this can lead to spills or difficulty in sealing it properly. If necessary, use your hand to gently squeeze the bag, checking for any excess water that may have entered beyond the fill line. Adjust the water level as needed by either adding more water or removing some with a small opening at the top. Always prioritize safety and functionality by ensuring the bag is not filled too tightly.
Seal the Shower Bag
Fill the shower bag with water, leaving some space at the top to allow for expansion. Once filled, press the top of the bag together and zip it closed firmly. Make sure the zipper is aligned properly and fully engaged to prevent any leaks during use.
Check the seal by running your fingers along the zipper line to ensure it feels secure. Give the bag a gentle shake to test for leaks; if you notice any water escaping, open the bag and re-zip it carefully, making sure to eliminate any trapped air that could compromise the seal.
Hang the Shower Bag
Find a suitable location for your portable shower bag, aiming for a spot that is at least 5-7 feet above the ground. Look for a sturdy tree branch, a strong hook, or any reliable support that can hold the weight of the filled shower bag. Ensure the support is secure and can withstand the force of gravity when the water flows out.
Lift the shower bag and carefully hang it from your chosen support. Adjust the height if necessary, ensuring that the nozzle is at a comfortable level for use. Check that the bag is stable and won’t sway or fall. Once secured, allow gravity to channel the water down through the nozzle, providing a refreshing shower experience.
Final Steps for Setup
In conclusion, filling the Advanced Elements Portable Shower is an easy and efficient task that enhances your outdoor experience. By following the simple steps of gathering supplies, locating a water source, filling and sealing the bag, and properly hanging it, you can enjoy a refreshing shower wherever your adventures take you. With these tips in mind, you’ll be well-prepared for a clean and revitalizing experience in the great outdoors.
Essential Supplies Needed
Effortless Setup Guide
Step-by-Step Guide to Setting Up and Enjoying Your Advanced Elements Portable Shower
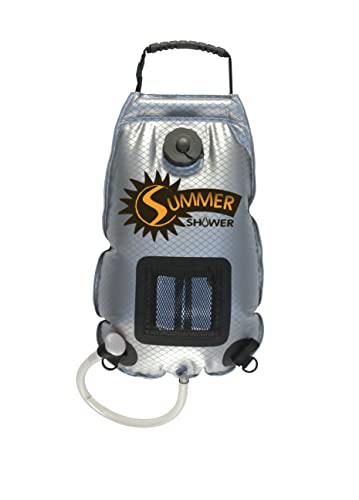
- Setup the Shower: Unfold the shower bag and fill it with water. Make sure the water is heated in the sun for optimal temperature. Hang the bag from a sturdy structure (tree branch, shower pole, etc.) about 5-7 feet above the ground
- Check the Nozzle: Ensure the shower nozzle is securely attached and test it before use. Turn the valve to check the water flow and adjust it to your preference
- Adjust the Temperature: If the water is too hot or too cold, you can add cold water or allow the bag to sit longer in the sun to reach a comfortable temperature before showering
- Use Privacy Shelter: If you’re in a public place or camping, set up a privacy shelter or tent around the shower area for a comfortable and discreet experience
- After Use: Once you’re done showering, drain the remaining water from the bag. Clean and dry the shower bag before storing it away to ensure longevity and prevent mold growth
Your Questions Answered About the Advanced Elements Portable Shower
The Advanced Elements Portable Shower is known for its unique design and features that set it apart from many other portable showers on the market. Here are some key comparisons:
- Material and Durability: The Advanced Elements shower is made from durable, heavy-duty materials that are designed to withstand outdoor conditions. Many competing products may use lighter materials that could be less durable over time.
- Water Capacity: It typically has a larger water capacity, often around 5 gallons, which allows for multiple showers before needing a refill. This is generally more than what smaller models offer.
- Heating Feature: The Advanced Elements Portable Shower has a built-in solar heating feature, which can warm the water through solar energy. While some other portable showers may have a similar feature, not all do, and the efficiency can vary.
- Ease of Use: It includes a flexible hose and a showerhead that allows for adjustable water flow, making it user-friendly. Other portable showers may have more basic setups, which can limit usability.
- Portability: The design allows for easy storage and transport, folding down to a compact size. Some competitors may not offer the same level of portability or ease of setup.
- Price Point: The Advanced Elements shower is often priced higher than basic models but is seen as a good investment for its features and quality. Cheaper alternatives may lack durability and functionality.
Overall, the Advanced Elements Portable Shower is often favored for its combination of durability, capacity, and practical features, making it a strong contender in the portable shower market.


Hey, this guide is super helpful! Do you have any advanced tips for maximizing water temperature or pressure when using the Advanced Elements Portable Shower? I’ve heard there are some tricks, like using black bags in sunlight. Can you share more? Thanks!
I’d love to see more about how to maintain the Advanced Elements Portable Shower or maybe tips on cleaning it after use. Sometimes I worry about the mold or mildew, especially if I’m camping for a while. Any advice?
That’s a fantastic suggestion! Keeping the shower clean is super important. I’ll definitely consider writing a piece on maintenance and cleaning tips to ensure your shower lasts longer and stays fresh. Stay tuned!
I’ve been using the Advanced Elements Portable Shower for a few camping trips now, and I’ve found that filling it halfway and swinging it around helps mix the water better and get an even temperature. It also makes it easier to hang since it’s lighter! Just thought I’d share in case it helps someone else!
Thanks for sharing your tip! Mixing the water like that is a clever idea, and it’s always good to lighten the load. Your experience will definitely help other campers make the most of their showers. Keep the tips coming!
Great question! Using a black shower bag in direct sunlight can definitely help heat the water faster. You can also try filling the bag with hot water from your sink before adding cold water to balance it out. Let it sit in the sun for a bit before showering to get the best temp! Happy showering!